
Want to Performance test your web Applications? Then you should know about Apache JMeter.
What is Apache JMeter?
It is a 100% pure Java application and Open Source testing software .It was designed for load, stress, functional, performance testing. It requires JDK 5 or higher.
What is performance testing ?
Performance testing is the process of determining the speed or effectiveness of a computer, network, Software program or device. In this process involve quantitative tests done in a lab, such as measuring the response time or the number of MIPS (millions of instructions per second) at which a system functions. Qualitative attributes such as reliability, scalability and interoperability may also be evaluated. Performance testing is often done in conjunction with stress testing.
What is Load Test?
Testing an application under heavy loads.
Ex :Testing of a website under a range of loads to determine when the system response time degraded or fails
What is Stress Test?
Testing under unusually heavy loads, heavy repetition of certain or inputs, an input of large numerical values, large complex queries to a database, etc.
What is VolumeTest?
To determine system performance with increasing volumes of data in the database
How to install JMeter in Mac
Step 1: Install Java
JMeter is pure Java application; it requires a fully compliant JVM 6 or higher. You can download and install the latest version of Java SE Development Kit.
Once installed, you can use the following procedure to check whether Java JDK is installed successfully in your system.
Enter this command in terminal "java –version"
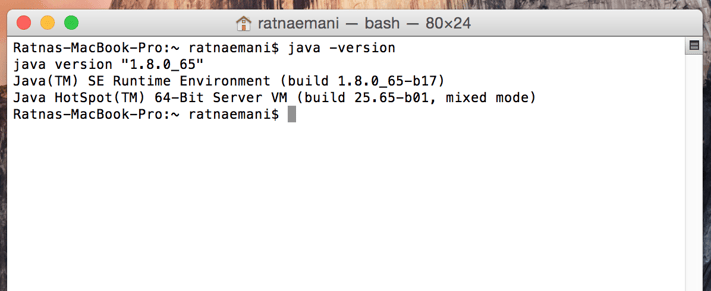
If Java runtime environment is installed successfully, you will see the output as figure If nothing displays, please re-install Java SE runtime environment .
Step 2: Install JMeter on Mac
The easiest way to install Jmeter using brew.
"brew install jmeter" Run this command on Terminal
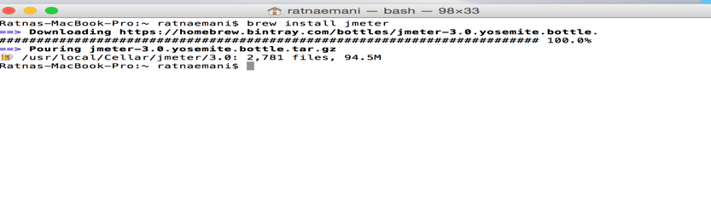
And then Run the below command on terminal, JMeter window will open
open /usr/local/bin/jmeter

JmeterWindow:
Writing Test plan :
Follow the steps given below.
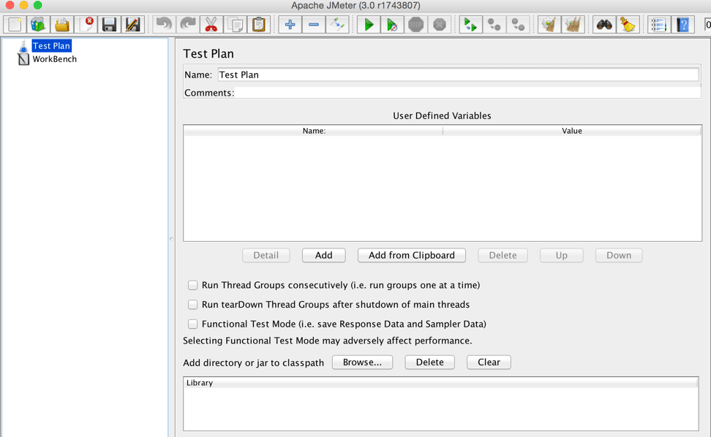
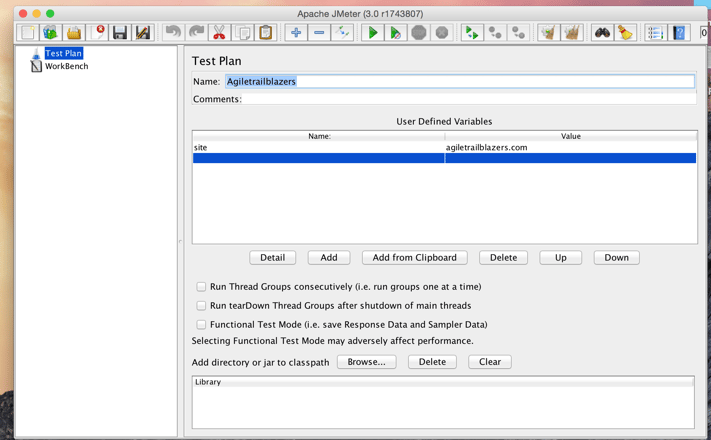
Step 1: Start The Jmeter
This is a JMeter window. It contains two sections −
- Test Plan −In this sesction where the real test plan is kept.
- Workbench − Its temporarily store test elements while not in use, for copy/paste purposes. In Jmeter window we can add Test Plan name and comments.
- And then Add user defined variables.
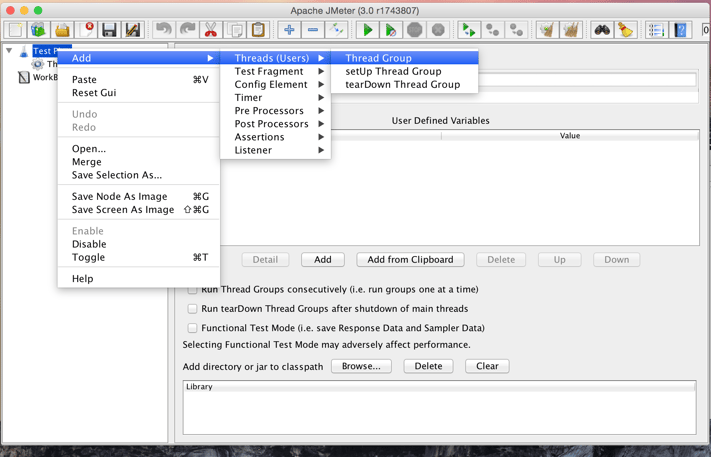
Step 2: Add Threads Group
- Right-clicking on the Test Plan and add new element from the "add" list.
- Mean while we can load an element from a file and add it by choosing the "merge" or "open" option.let us add a Thread Group element to a Test Plan as shown below.
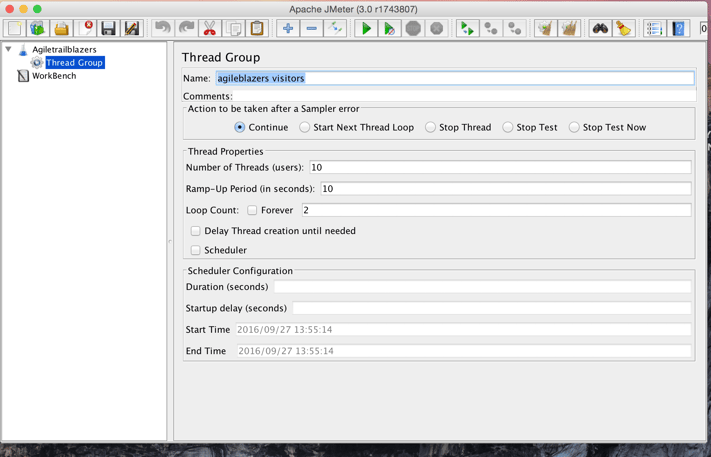
And then add the Thread Group Name , Thread Properties values ,and click the radion button "action to taken after sampler error (stop Next Thread Loop)" .
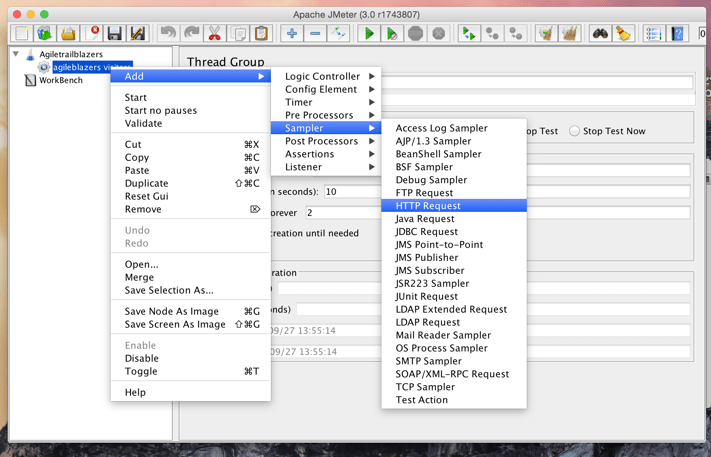
Step 3: Add Sampler
In thread group page add sampler HTTP Request.
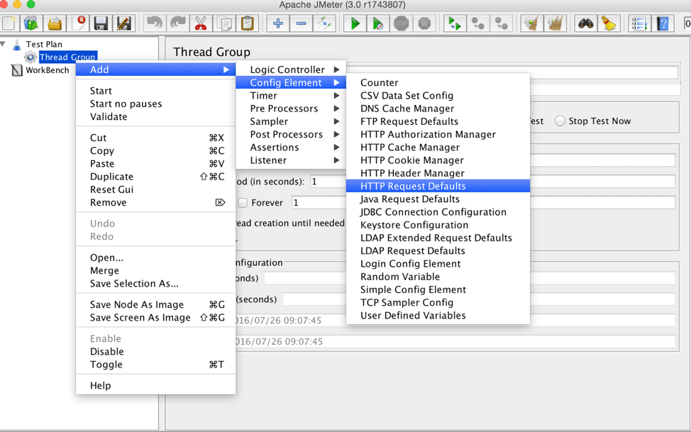
Step 4: How to add HTTP Request
Right –clicking on the Thread Group And add Config Element And add Http Request Defaults From “add “ List.
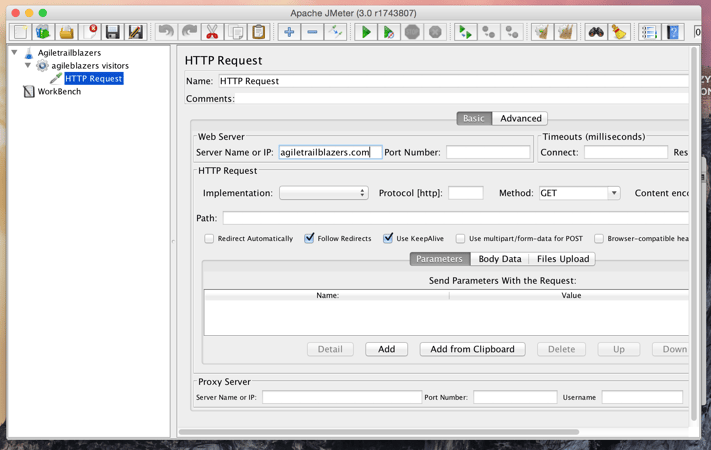
Step 5: HTTP Request Page
- On HTTP Request Page Add the Webserver Name or Portnumber.
- i.e: CirrusLabs.com And don't add Http Request Likes this "https://www.cirruslabs.io/"
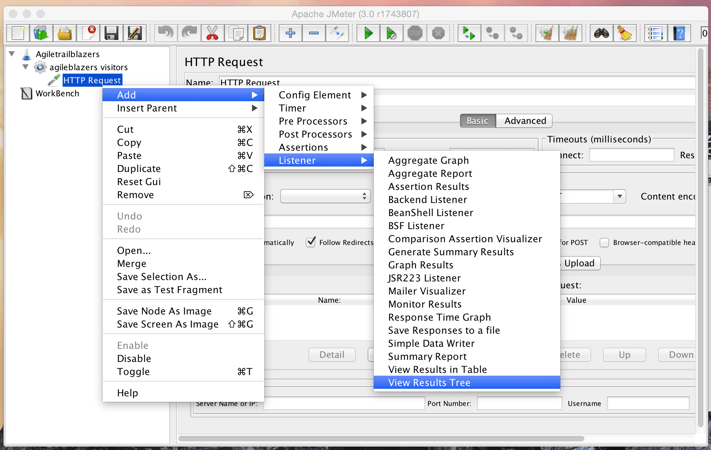
Step 6 : Add Listener
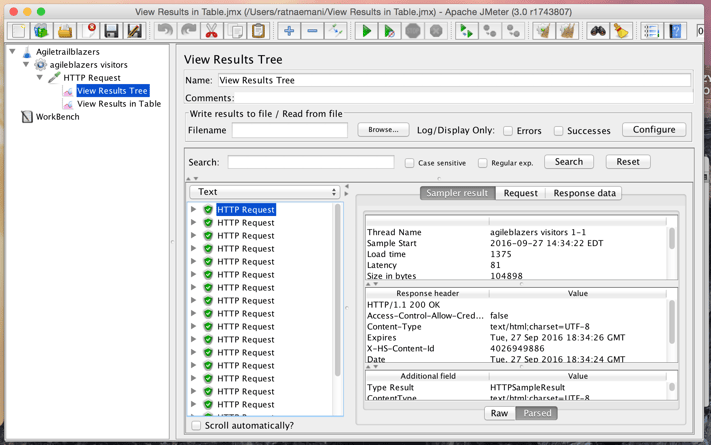
Listeners let you view the results of Samplers in the form of tables, graphs, trees, or simple text in some log files. They provide visual access to the data gathered by JMeter about the test cases as a Sampler component of JMeter is executed.
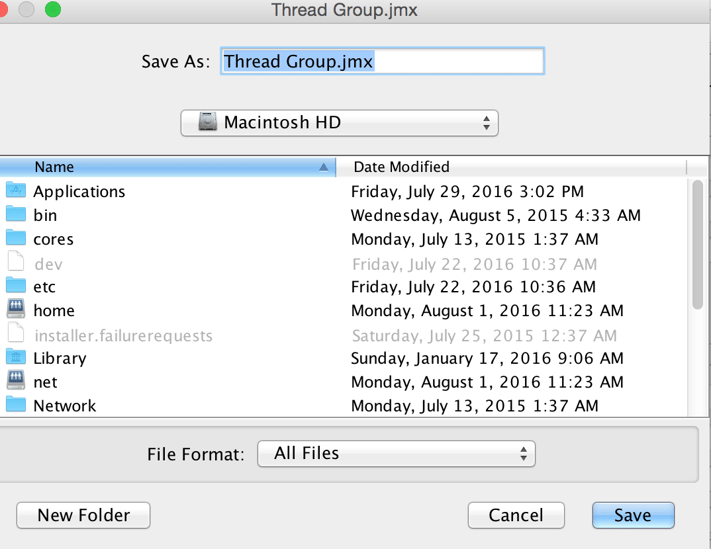
To save elements −
JMeter will save the element selected. JMeter doesn't save un select elements, we need to save it .
Step 7 −Run Test plan
Run the Test Plan by clicking Start(Control + r) from the Run menu item. When JMeter starts running, a small green box appears at the right-hand end of the section just under the menubar.
Step 8: Test Results
Verify the results on view Results In table
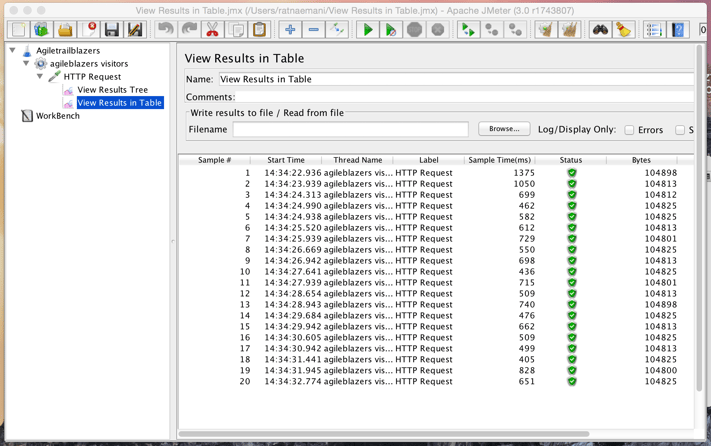
Click on "View Results Tree" if you want to see the results on view results tree
Learn more about modernized technology here:

Interested in training to help advance your agile journey? Click the button to view our current list of public training courses! Use code BLOG10 for 10% off!
