Have you ever had your scrum master ask you, "what is going on with that story?" As somebody that has assumed virtually every role possible on an Agile team over the course of my career, I can assure you that I have heard it many times, and I'm sure you have too. Certainly there are many ways to answer this question, but in my opinion, the best way is to make it possible for your scrum master to find the answer for themselves, using the teams primary tool, JIRA. In this article, I explain how you can make your scrum master happy by configuring your developer's primary tools, Jira, GitHub, and Jenkins to play nicely together and update JIRA stories with all of the information that your scrum master wants to see. So let's get started.
Step 1 - Configure GitHub
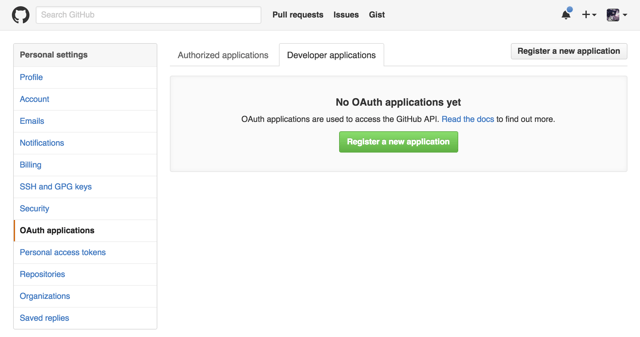
For JIRA to communicate with GitHub, a trust between the two applications first needs to be established, in this case, we will be using OAuth authentication. Configuring the OAuth trust begins in GitHub.- Navigate to the Settings for the logged in GitHub user, ideally this will be a user created specifically for use by JIRA
- Click on OAuth applications from the side menu
- Click on the Developer applications tab
- Click the Register a new application button
- Fill in the required information about your JIRA instance
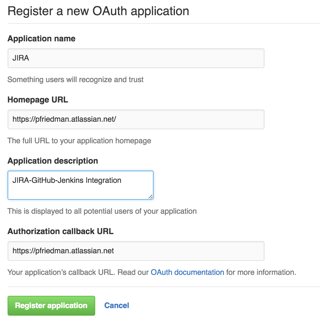
- Click the Register application button
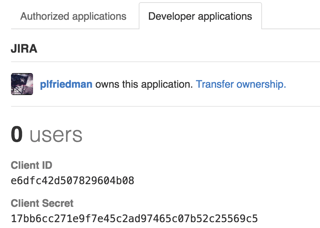
- Save the Client ID and Client Secret, you will need them when configuring JIRA in Step 2.
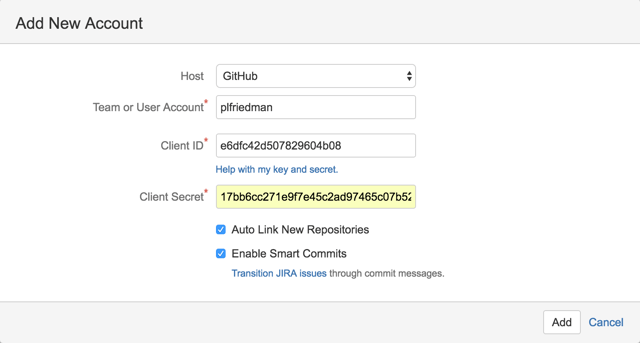
Step 2 - Configure JIRA
Now that we have created the OAuth trust in GitHub, we need to configure JIRA to use it.
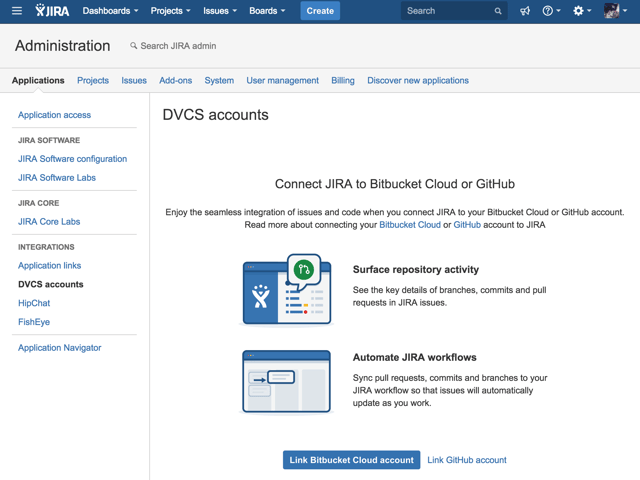
- Navigate to the JIRA Administration and click the Applications tab
- Click on DVCS accounts under INTEGRATIONS in the side menu
- Click the Link GitHub account link
- Enter the OAuth Client ID and Client Secret that were generated in GitHub.
- Click the Add button.
- You will be directed to GitHub to authorize the application, do so by clicking on the Authorize application button
- Control will return back to JIRA and the GitHub repository will appear in the list of DVCS accounts.
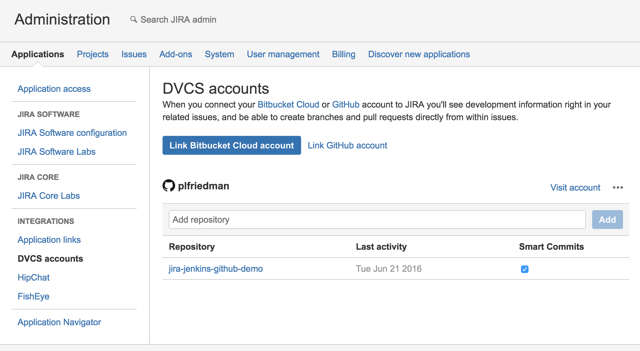
- At this point, JIRA will begin scanning your GitHub instance looking for references to JIRA issues (stories). JIRA looks for at least two uppercase letters, a dash, and a number as an issue key (i.e. JJGD-1). If it finds an issue key in a branch name or a commit, it will display it as a link to GitHub in the development panel for that issue.
Step 3 - Configure Jenkins
We are almost there, now we have to configure the JIRA plugin for Jenkins so that Jenkins can update JIRA issues (stories) with build related information, this will complete the loop of information between JIRA, GitHub, and Jenkins. Note, this assumes you already have Jenkins configured to build GitHub based projects, as that configuration is outside the scope of this article.
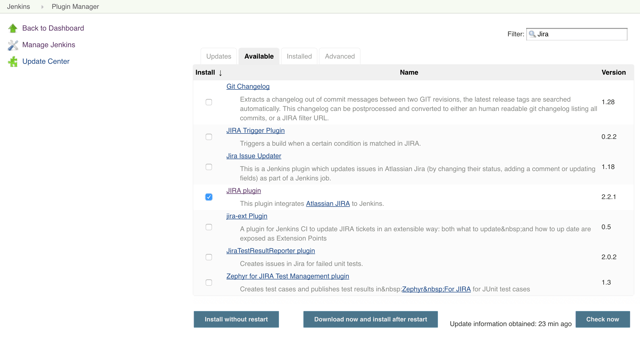
- Install the Jira Plugin into Jenkins
- Click on the Manage Jenkins link in the side menu of the Jenkins dashboard
- Click on the Manage Plugins link
- Click on the Available tab and filter by "JIRA"
- Select JIRA plugin and click the Install without restart button, you will see the JIRA plugin successfully installed.
- Configure the JIRA site to be used by the JIRA plugin
- Click on the Manage Jenkins link in the side menu of the Jenkins dashboard
- Click on Configure System
- Scroll down the page to the JIRA section and add a JIRA site by clicking on the Add button and entering your JIRA URL and credentials
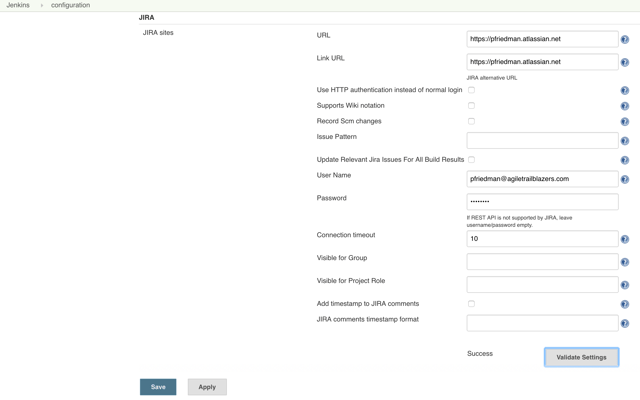
- Save the configuration changes
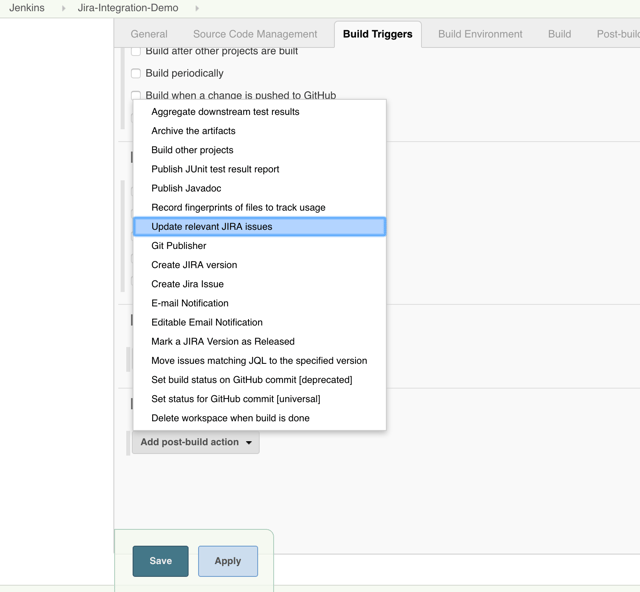
- Configure a project to use the JIRA plugin by adding a post-build action to Update relevant JIRA issues to the projects configuration
Let's See How It All Ties Together
See, that wasn't too bad, now let's prove it worked!
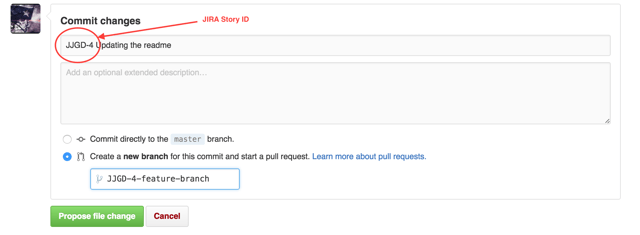
Let's edit a file and commit the change in GitHub, making sure to reference the JIRA story in the commit message; without it, the integration won’t work. In this case, the change was committed to a feature branch and a pull request was created and merged.
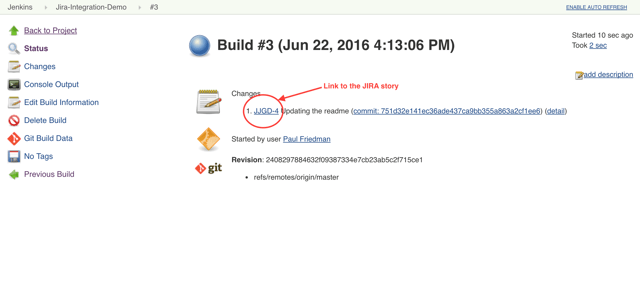
Since our build was triggered by the GitHub commit, we can go directly to the build result page and see the “Changes” listed by the GitHub plugin. The JIRA story included in the description of the change has been replaced by a link directly to the story in your JIRA site; this was done automatically by the JIRA plugin.
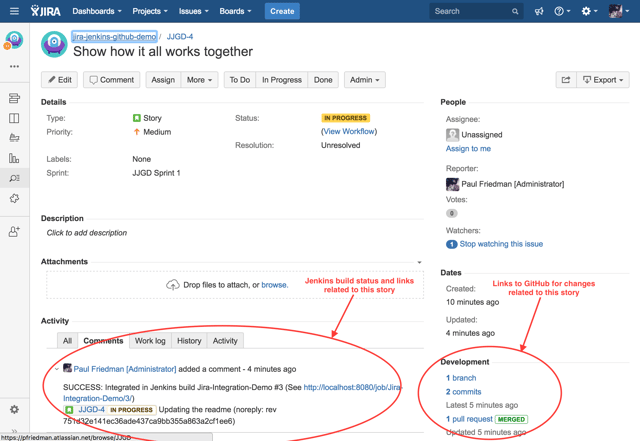
 Following that link to the story in JIRA, we see that the “Development” section has been updated with the Git commit and the merged pull request from GitHub. Additionally, we also see that the build status and link to the build page have also been added.
With the combination of GitHub and Jenkins integrations, the complete life cycle of a JIRA story can be traced through your development and DevOps workflows simply by viewing the story in JIRA. Not only will this make your scrum master happy, it will also help your entire team by providing transparency and visibility into the status of any story.
I hope this article helped you to get started, Learn More about how CirrusLabs can help with your DevOps.

Learn more about building and strengthening an agile organization here:

Interested in training to help advance your agile journey? Click the button to view our current list of public training courses! Use code BLOG10 for 10% off!
